Mistakes That Can Kill
The sweet satisfaction of opening a jar of homemade peaches in the dead of winter can quickly turn into a nightmare if you’ve made critical canning mistakes. Every year, dozens of families face life-threatening botulism poisoning because they unknowingly violated fundamental home canning safety principles. What seems like an innocent hobby can become deadly when proper food preservation techniques are ignored.
Home canning has experienced a remarkable resurgence, with millions of Americans rediscovering the art of preserving seasonal bounty. However, this renewed interest has also led to a concerning increase in botulism cases from improperly canned foods. The stakes couldn’t be higher – botulism poisoning can cause paralysis, respiratory failure, and death within hours of consumption.
Expert Insight
“The beauty of home canning lies in its simplicity, but that same simplicity can be deceptive. One small deviation from tested recipes or proper techniques can create the perfect environment for deadly bacteria to thrive.” – Dr. Sarah Mitchell, Food Safety Specialist
Understanding the dangerous canning mistakes that lead to food poisoning isn’t just about following rules – it’s about protecting your family’s health and potentially saving lives. This comprehensive guide will walk you through the most critical errors that home canners make, the science behind why these mistakes are so dangerous, and the specific steps you need to take to ensure your preserved foods are safe.
The Silent Killer: Understanding Botulism in Home Canning
Botulism represents the most serious threat in home food preservation, and botulism bacteria grow in moist, oxygen-free environments, making improperly canned foods ideal breeding grounds. Unlike other foodborne illnesses that might cause temporary discomfort, botulism attacks the nervous system, causing progressive paralysis that can lead to respiratory failure.
The botulism prevention guidelines established by the CDC and USDA aren’t suggestions – they’re life-saving protocols developed through decades of research and tragic real-world cases. Clostridium botulinum spores are naturally present in soil and can survive in improperly processed foods, producing toxins that are among the most potent poisons known to science.
Critical Warning Signs
“Never consume home-canned food if the jar shows any signs of damage, bulging, or unusual odors. These visual cues can literally be the difference between life and death.” – Food Safety Extension Agent Maria Rodriguez
The symptoms of botulism poisoning typically appear within 12 to 36 hours after eating contaminated food, beginning with double vision, drooping eyelids, and difficulty speaking. As the toxin spreads through the nervous system, victims experience progressive muscle weakness that can culminate in respiratory paralysis.
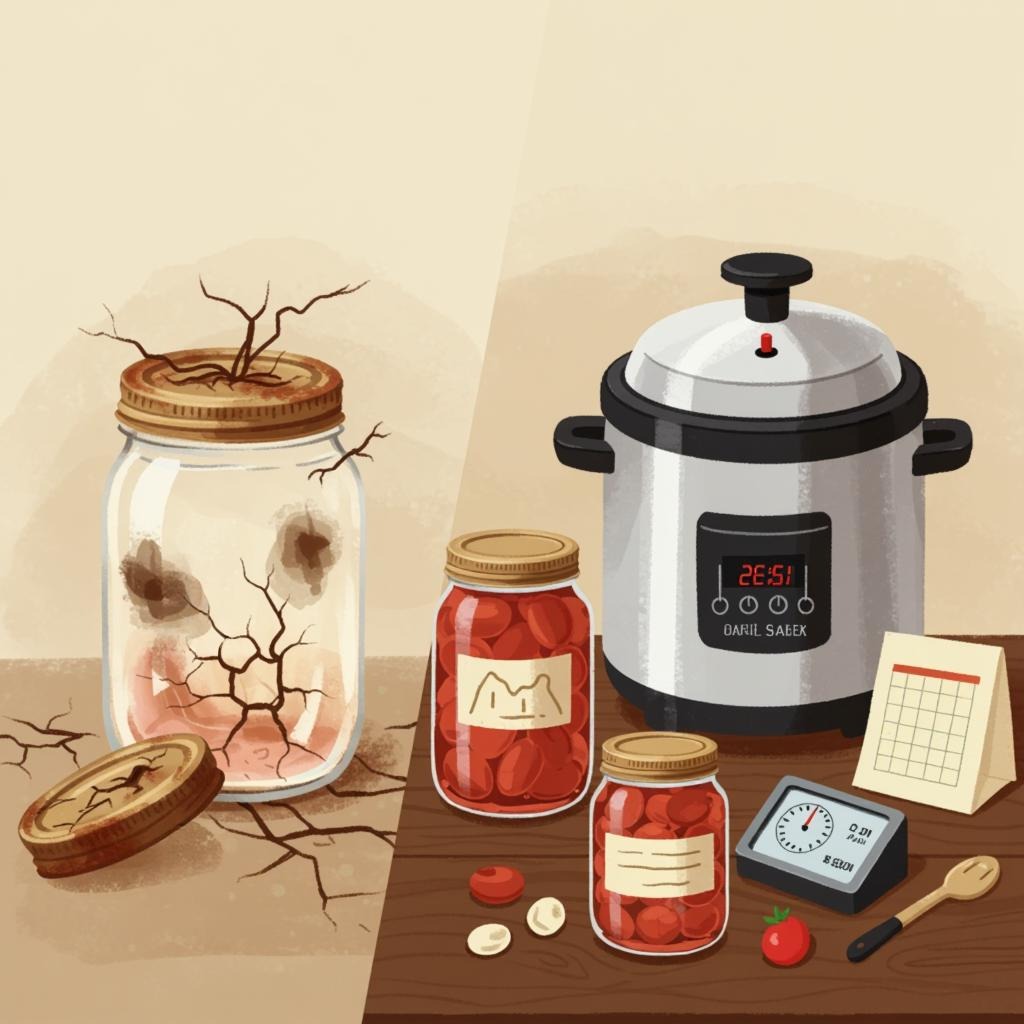
Fatal Mistake #1: Using the Wrong Canning Method
The most dangerous error in home canning involves using water bath canning for low-acid foods. This seemingly innocent mistake has caused countless cases of botulism poisoning because water bath canning simply cannot reach the temperatures necessary to destroy botulism spores in low-acid foods.
Understanding the difference between high-acid and low-acid foods is crucial for safe home canning practices. High-acid foods (pH 4.6 or lower) include most fruits, pickles, and properly acidified tomatoes. These foods can be safely processed in a boiling water bath because their natural acidity creates an environment hostile to botulism bacteria.
Low-acid foods, however, require the intense heat that only pressure canning can provide. Low-acid foods must be processed at a temperature of 240°F, which is only achievable through pressure canning. This category includes:
- All vegetables (except properly pickled varieties)
- Meats and poultry
- Seafood and fish
- Dairy products
- Combination foods containing low-acid ingredients
Equipment Warning
“Electric multi-cookers, even those with ‘canning’ settings, should never be used for pressure canning. Only USDA-tested pressure canners can guarantee the sustained temperatures needed for safe low-acid food preservation.” – National Center for Home Food Preservation
The science behind this requirement is unforgiving. Boiling water canners cannot protect against botulism when processing low-acid foods, regardless of how long you process them. The 212°F temperature of boiling water is insufficient to destroy botulism spores, which can survive and later produce deadly toxins in the sealed jar environment.
 Fatal Mistake #2: Ignoring Altitude Adjustments
Altitude significantly affects both water bath and pressure canning, yet many home canners living at higher elevations fail to make the necessary adjustments. This oversight can result in under-processed foods that harbor dangerous bacteria.
For water bath canning altitude adjustments, you must increase processing time because water boils at lower temperatures at higher altitudes. The standard boiling point of 212°F drops as elevation increases, meaning your canned goods won’t reach the temperatures needed for safe preservation without extended processing times.
Here are the critical altitude adjustments for water bath canning:
- Sea level to 1,000 feet: No adjustment needed
- 1,001 to 3,000 feet: Add 5 minutes to processing time
- 3,001 to 6,000 feet: Add 10 minutes to processing time
- Above 6,000 feet: Add 15 minutes to processing time
Pressure canning altitude adjustments work differently. Pressure canning requires increased pressure at higher altitudes to maintain the necessary temperature for destroying heat-resistant bacteria. The adjustments are:
- Sea level to 1,000 feet: 10 lbs pressure (dial gauge), 11 lbs pressure (weighted gauge)
- 1,001 to 2,000 feet: 11 lbs pressure (dial gauge), 15 lbs pressure (weighted gauge)
- 2,001 to 4,000 feet: 12 lbs pressure (dial gauge), 15 lbs pressure (weighted gauge)
- 4,001 to 6,000 feet: 13 lbs pressure (dial gauge), 15 lbs pressure (weighted gauge)
- Above 6,000 feet: 14 lbs pressure (dial gauge), 15 lbs pressure (weighted gauge)
Altitude Reality Check
“I’ve seen too many cases where people assume their ‘sort of high’ elevation doesn’t matter. Even at 1,500 feet, you need to make pressure adjustments. This isn’t a suggestion – it’s a life-saving requirement.” – Extension Agent Tom Williams
Fatal Mistake #3: Modifying Tested Recipes
The temptation to “improve” canning recipes by adding extra vegetables, reducing salt, or changing ingredient ratios has led to numerous botulism cases. Tested canning recipes undergo rigorous scientific testing to ensure they achieve the proper pH levels and heat penetration needed for safety.
When you modify a canning recipe, you’re essentially conducting an uncontrolled experiment with your family’s health as the test subjects. Changes that seem minor can have devastating consequences:
- Adding extra vegetables can increase the pH, making the food less acidic and more hospitable to botulism
- Reducing salt or vinegar compromises the preservative effects these ingredients provide
- Changing processing times can result in under-processed centers that harbor dangerous bacteria
- Substituting ingredients can alter the food’s density, affecting heat penetration
The USDA complete guide to home canning provides hundreds of tested recipes that have been validated through scientific research. These recipes specify exact ingredient ratios, processing times, and methods because each element contributes to the final product’s safety.
Recipe Safety Protocol
“Every tested recipe represents hundreds of hours of laboratory work and safety testing. When you change even one ingredient, you’re potentially undoing all that safety research.” – Dr. Elizabeth Andress, Food Safety Researcher
Fatal Mistake #4: Improper Jar Preparation and Sealing
Proper jar preparation goes far beyond simply washing your containers. Canning jar safety requires attention to every detail, from checking for chips and cracks to ensuring proper headspace and seal formation.
Start by inspecting every jar for damage. Even tiny chips or cracks can prevent proper sealing, creating entry points for bacteria. Hairline cracks might not be visible until the jar is filled and heated, potentially causing dangerous seal failures.
The importance of proper headspace cannot be overstated. Too little headspace can cause food to bubble up and interfere with sealing, while too much headspace can result in discoloration and poor vacuum formation. Standard headspace requirements are:
- ¼ inch headspace: Jams, jellies, and fruit spreads
- ½ inch headspace: Most fruits, pickles, and relishes
- 1 inch headspace: Most vegetables, meats, and low-acid foods
- 1¼ inch headspace: Dried beans and corn
Lid preparation is equally critical. New canning lids should be warmed (not boiled) in hot water to soften the sealing compound. Never reuse canning lids, as the sealing compound can only form a proper seal once.
Sealing Science
“The vacuum seal that forms during cooling isn’t just about preservation – it’s your primary defense against contamination. A proper seal, combined with correct processing, creates an environment where dangerous bacteria cannot survive.” – Food Science Professor Dr. James Wright
Fatal Mistake #5: Inadequate Processing Times and Temperatures
Perhaps the most dangerous assumption in home canning is that “close enough” is good enough when it comes to processing times and temperatures. Canning processing times are calculated based on the worst-case scenario – the slowest-heating spot in the jar, typically the center.
Under-processing occurs when canners reduce recommended processing times, fail to maintain proper pressure, or don’t account for the size of food pieces. Larger pieces take longer for heat to penetrate to the center, potentially leaving dangerous bacteria alive in the jar’s core.
Temperature control is equally critical. Pressure canners must maintain consistent pressure throughout the entire processing time. Fluctuating pressure can result in uneven heating and compromise the safety of your canned goods.
Common processing errors include:
- Starting the timer too early before the canner reaches proper pressure
- Allowing pressure to drop during processing
- Not adjusting for jar size – larger jars require longer processing times
- Packing jars too tightly which impedes heat circulation
- Processing mixed jar sizes together without adjusting for the largest jars
Processing Precision
“Heat penetration to the center of a jar happens slowly and predictably. The processing times in tested recipes account for this thermal lag. Cutting processing time short, even by a few minutes, can leave deadly bacteria alive in the jar’s center.” – Thermal Processing Specialist Dr. Karen Matthews
Recognizing the Warning Signs of Contaminated Canned Foods
Knowing how to identify potentially dangerous canned foods can save lives. Never consume home-canned food if the jar is leaking, bulging, or swollen, if the container is damaged, or if the food is discolored, moldy, or smells bad.
Visual inspection should be your first line of defense. Look for:
- Bulging or swollen lids indicating gas production from bacterial activity
- Broken or cracked jars that may have allowed contamination
- Loose or missing lids suggesting seal failure
- Spurting liquid when the jar is opened
- Unusual odors – properly canned foods should smell normal
- Mold growth on the food surface or lid underside
- Cloudy liquid in vegetables that should be clear
- Color changes beyond normal aging
Even if canned food looks and smells normal, it can still contain botulism toxin. When in doubt, throw it out. The potential consequences of consuming contaminated food far outweigh the cost of discarding questionable products.
Emergency Response
“If you suspect botulism poisoning – difficulty speaking, swallowing, or breathing – seek emergency medical attention immediately. Botulism antitoxin is most effective when administered early, and every minute counts.” – Emergency Medicine Physician Dr. Robert Chen
Building Your Safe Canning Foundation
Safe canning starts with proper equipment and education. Invest in quality equipment that will serve you well for years:
- USDA-approved pressure canner with accurate gauges
- Reliable canning jars designed for home canning
- New lids for every batch – never reuse canning lids
- Proper measuring tools for accurate ingredient ratios
- Tested recipe sources from reputable organizations
Education is your most powerful tool for safe canning. Take advantage of resources from your local extension office, which often offers hands-on canning classes. These classes provide practical experience and allow you to ask questions about specific situations.
Stay current with canning safety information. Food preservation science continues to evolve, and recommendations may change based on new research. What your grandmother did safely 50 years ago might not meet today’s safety standards.
Continuous Learning
“Safe canning is a skill that requires ongoing education. Technology improves, research advances, and safety standards evolve. The canner who never updates their knowledge is the one most likely to make dangerous mistakes.” – Master Food Preserver Janet Thompson
Creating Your Personal Safety Protocol
Develop a personal safety checklist that you follow for every canning session. This systematic approach helps prevent the small oversights that can lead to dangerous situations.
Your home canning safety checklist should include:
- Equipment inspection – check canner, jars, and lids before starting
- Recipe verification – confirm you’re using a tested recipe from a reliable source
- Altitude adjustment calculation – adjust processing time or pressure for your elevation
- Ingredient measurement – use exact quantities specified in the recipe
- Processing documentation – record times, temperatures, and dates
- Seal verification – check for proper seals 12-24 hours after processing
- Storage labeling – include contents, date, and batch information
Keep detailed records of your canning activities. Document the date, recipe source, processing method, and any observations about the batch. This information becomes invaluable if you need to trace problems or compare results between batches.
The Path Forward: Safe Canning for Life
Home canning represents one of the most rewarding ways to preserve food and connect with traditional skills, but it demands respect for the science behind food safety. The mistakes outlined in this guide have caused real tragedies, but they’re all preventable through proper education and careful attention to detail.
Remember that safe canning practices aren’t restrictions on your creativity – they’re the foundation that allows you to preserve food safely for your family. Every tested recipe, every processing time, and every safety guideline exists because someone took the time to ensure that following these protocols will keep you safe.
The investment in proper equipment, education, and careful technique pays dividends in the form of safely preserved food that you can enjoy with confidence. There’s no substitute for doing it right the first time, and the peace of mind that comes from knowing your canned goods are safe is priceless.
Final Words of Safety
“The goal of home canning isn’t just to preserve food – it’s to preserve food safely so you can nourish your family without worry. Every precaution you take, every guideline you follow, and every tested recipe you use is an investment in your family’s health and safety.” – Master Food Preserver Association
Take the time to learn proper techniques, invest in quality equipment, and never compromise on safety protocols. Your family’s health depends on the decisions you make in your kitchen, and with the right knowledge and practices, you can enjoy the benefits of home canning for years to come.
The deadly mistakes outlined in this guide are completely preventable, but only if you’re committed to following established safety protocols. Make that commitment today, and you’ll be able to enjoy the fruits of your labor with confidence and peace of mind.