Dehydrating Vegetables at Home: Beginner's Guide to Long-Term Storage
Dehydrating vegetables might just be the smartest step you take for your emergency food stash in 2025. Not only does this preservation method lock in nutrients, but it also drastically extends shelf life, saving you precious space and money. Whether you’re prepping for uncertain times or simply aiming to minimize food waste, learning how to dehydrate vegetables properly could be a true game-changer.
Understanding the Dehydration Process
At its core, dehydration is the removal of moisture from food to prevent bacteria, mold, and yeast from spoiling it. Without water, microorganisms can’t grow, and enzymatic reactions slow dramatically, extending the life of your food. The key lies in controlling temperature and air circulation to dry the food evenly without cooking it, typically keeping temperatures between 125°F to 135°F for vegetables.
Moisture content is critical. Vegetables need to be dried to a moisture level of about 10-20%. Proper airflow is equally important to wick away moisture, ensuring even drying and preventing pockets of dampness that invite spoilage.
Benefits of Dehydrating Vegetables for Long-Term Storage
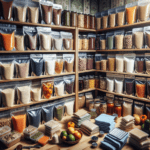
Dehydrated vegetables occupy a fraction of the space that canned or frozen goods require. You can store a season’s worth of produce in just a few airtight containers.
Another plus? Dehydrated foods are incredibly resilient. Properly dried vegetables rarely fall victim to mold or decay, especially when kept in cool, dry environments. When done correctly, dehydration preserves much of the flavor, texture, and nutritional value. Plus, if you’re harvesting an overflowing garden or hitting up seasonal farmers’ markets, dehydrating can help you stretch those dollars even further.
Essential Tools and Equipment
Dehydrator Basics
Investing in a good food dehydrator will make the process smoother and more reliable. There are two main types: stackable models, where trays pile up in a column, and box-style dehydrators, which resemble mini-ovens. Look for critical features like adjustable thermostats, timers, and horizontal airflow systems for the best results.
Oven Dehydration
No dehydrator? No problem—your kitchen oven can work in a pinch. However, be warned: ovens aren’t as energy-efficient and can sometimes cook vegetables rather than dehydrate them. If using an oven, keep the door open slightly to aid airflow and maintain a consistent low temperature, usually the “warm” setting.
Other Methods
Sun drying can work if you live in a hot, dry environment with minimal humidity. Homemade drying setups, like mesh screens or DIY racks, are an option, but they require diligent monitoring to avoid spoilage.
Selecting and Preparing Vegetables
Best Vegetables to Dehydrate
Some vegetables are exceptional candidates for dehydration. Top choices include tomatoes, carrots, onions, bell peppers, zucchini, and green beans. Leafy greens like kale and spinach also dry well but need a gentle touch.
Certain vegetables—such as broccoli, cauliflower, and cabbage—require extra care and pretreatment to reduce strong odors and preserve quality.
Pre-Dehydration Steps
Start with thorough washing to remove dirt and possible pesticides. Peel if necessary, then slice or dice your vegetables uniformly. Consistent thickness ensures even drying across all pieces, preventing overly dry or underdone sections.
Blanching Recommendations
Blanching is a quick steam or boiling water treatment that helps lock in color, texture, and nutritional value. Vegetables like green beans, carrots, and broccoli benefit greatly from blanching. Timing matters—over-blanching can make vegetables too soft, while under-blanching leaves enzymes active. For example, carrots usually need about 3 minutes in boiling water.
Step-by-Step Dehydration Guide
Arranging Vegetables on Trays
Spread vegetables in a single layer on dehydrator trays, ensuring pieces don’t overlap. Rotate trays periodically to compensate for any hot or cool spots. For small or sticky pieces, parchment paper or reusable non-stick sheets work wonders.
Setting Temperatures and Times
A general rule of thumb: set dehydrators to 125°F for vegetables. Drying times vary—zucchini slices might be done in 6-8 hours, while dense carrots could take 10-14 hours. Watch for vegetables to become thoroughly dry but still slightly pliable or brittle, depending on the vegetable type.
Checking Progress and Testing Doneness
Test dryness by letting a piece cool and then bending or tearing it. Brittle or leathery textures are ideal. If any moisture is felt on the inside, it needs more time. Under-dried produce can lead to mold during storage.
Cooling and Conditioning
Cool your dehydrated vegetables completely before storage. Conditioning involves loosely packing dried veggies and shaking the container once a day for about a week. This helps redistribute remaining moisture uniformly, ensuring safe long-term storage.
Proper Storage Techniques
Containers and Packaging
Airtight containers are a must. Use glass jars with tight-fitting lids, vacuum-sealed bags, or Mylar pouches with oxygen absorbers for optimal results. Always label containers with the dehydration and packaging date for easy rotation.
Storage Environment
Store your dehydrated bounty in a cool, dark, and dry place. Ideal temperatures hover around 60°F, and humidity should be kept below 20%. Direct sunlight and warmth degrade food quality over time.
Shelf Life and Periodic Checks
Home-dehydrated vegetables can last up to a year or longer when stored properly. Periodically check for condensation on container walls—a surefire sign moisture has crept in—or any odd smells or mold growth.
Using Dehydrated Vegetables
Rehydration Methods
To use dehydrated vegetables, simply soak them in water for 15-30 minutes or toss them directly into soups and stews where they’ll rehydrate while cooking. Hot water cuts down rehydration time significantly.
Recipe Ideas
Create instant soup mixes with dehydrated layered ingredients for fast meals during emergencies. Toss dried onions into rice as it cooks or sprinkle bell pepper flakes into a pasta sauce for a pop of flavor.
Everyday Convenience
Having dehydrated vegetables on hand means less chopping and prep work during busy weeks. It’s also a great way to sneak extra vegetables into family meals with minimal effort.
Tips for Maximizing Nutritional Value
To protect nutrients, always blanch when needed and use the lowest possible drying temperature that effectively removes moisture. Store in airtight containers away from light, oxygen, and heat to preserve sensitive vitamins such as A and C.
Sometimes, combining dehydration with other methods—like vacuum sealing or freezing—provides even better nutrient retention than dehydration alone.
Common Mistakes and How to Avoid Them
Overcrowding trays delays dehydration and causes uneven drying. Always ensure good spacing between slices.
Failing to blanch vegetables like broccoli or green beans means a higher risk of color loss and poor texture. Likewise, storing partially dried vegetables is a huge mistake—any retained moisture invites mold. Finally, don’t neglect regular checks to ensure your stash remains safe long-term.
Conclusion
Mastering vegetable dehydration can seem intimidating at first, but the payoff is absolutely worth it. With the right preparation, tools, and follow-through, you’ll have access to vibrant, nutrient-dense veggies all year round.
As food scientist and preservation expert Harold McGee once said, “The control of water is the control of food preservation.” Seize that control, experiment with your favorite vegetables, and enjoy the unmatched convenience and security that dehydrated produce brings—both in emergencies and everyday meals.
Related posts:
 Prepper Recipes
 Top 5 Freeze Dryers for Home Use: Reviews and Comparison Guide
 DIY Survival Food: 15 Easy Recipes You Can Make and Store Long-Term
 The Ultimate Guide to Freeze-Dried Foods: Benefits and Limitations
 5 Best Practices for Food Storage in Prepping for Long-term Survival
 Survivalists Dilemma: Is Drinking Urine a Viable Solution?
 Emergency Food Storage in Extreme Climates: Solutions for Heat, Cold, and Humidity
 Why Every Prepper Should Grow Microgreens at Home