This is Part 1 of our complete bullet-making survival series.
Continue with Part 2: Reloading Basics and Part 3: Safe Ammo Storage.
Casting Your Own Bullets: A Beginner’s Guide to DIY Ammunition
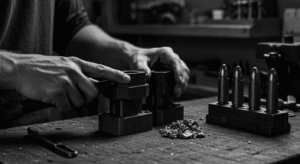
Looking for a practical skill to boost your self-reliance? Learning to cast your own bullets at home is one of the most useful, cost-saving steps any prepper, homesteader, or survivalist can take. In this guide, you’ll discover how to safely melt lead, pour your own bullets, and inspect them for quality — no expensive factory needed.
Why Cast Your Own Bullets?
Store-bought ammo is expensive and, during crises, can be hard to find. Casting your own bullets lets you turn scrap lead into useful projectiles, giving you control over your ammo supply and cutting costs dramatically. For many preppers, it’s as much about peace of mind as it is about savings.
“Bullet casting is the ultimate recycling project for self-reliant shooters. With basic tools and careful safety, you can transform scrap into security.”
— Survival Ballistics Trainer
Essential Gear for Beginners
Getting started with bullet casting doesn’t require a huge investment. Here’s what you’ll need:
- Lead source: Old wheel weights, plumbing scrap, or bought lead ingots.
- Melting pot: Electric pot or cast iron pot over a propane burner.
- Bullet molds: Choose the right mold for your firearm’s caliber.
- Ladle: For pouring molten lead into the mold cavities.
- Safety gear: Heavy gloves, safety glasses, long sleeves, and a face shield if possible.
- Ventilation: Work outdoors or in a well-ventilated area — lead fumes are no joke.

Step 1: Melt Your Lead Safely
Always start with clean lead. Place it in your melting pot and heat it slowly to about 600–700°F (315–370°C). Use a thermometer to monitor the temp. Skim off any dross (impurities) that float to the top.
Step 2: Pour and Mold
- Preheat your mold to reduce imperfections.
- Use your ladle to pour molten lead into each mold cavity smoothly.
- Let the lead cool for a minute or two.
- Tap the mold handle gently to release the bullets onto a soft towel or water bucket (optional for hardening).
“A properly preheated mold makes all the difference. Cold molds cause wrinkles; take your time and let the mold reach the right temp.”
— Randy Robinett, Bullet Mold Expert
Step 3: Inspect and Finish
Examine each bullet. Look for voids, cracks, or wrinkles. Use a scale to check for consistent weight — a few grains variation is normal, but major differences mean trouble. Resize and lubricate bullets if needed before storing or loading.
Common Beginner Mistakes
- Using dirty or contaminated lead without cleaning.
- Poor ventilation — always work in fresh air.
- Pouring lead too cold or too hot.
- Skipping protective gear.
Final Tips for Safe Bullet Casting
- Never melt lead indoors without proper exhaust ventilation.
- Keep water away from molten lead — a drop of water can cause dangerous splatter.
- Store your lead and molds safely, away from kids and pets.
“Treat casting like welding — respect the heat, protect your skin, and keep distractions to a minimum.”
— Brownells Safety Advisor
Ready to Take the Next Step?
Now that you know the basics of bullet casting, you’re one step closer to total ammo self-reliance. In Part 2, we’ll cover how to reload your cast bullets into reliable, safe ammunition for practice, hunting, or defense. Stay tuned — and stay safe!
Ready for the next step?
Read Reloading 101 to learn how to safely assemble your cast bullets into reliable ammunition at home.