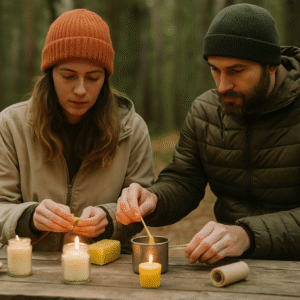
How to Make a Survival Candle: The Complete Emergency Guide
Creating a survival candle is one of the most practical and empowering DIY projects for emergency preparedness. Whether you’re prepping for a power outage, building a bug-out bag, or just love old-fashioned ingenuity, this step-by-step guide will teach you everything you need to know about how to make a survival candle using simple household items like butter, olive oil, cheese wax, and beeswax. With these natural materials, you’ll be equipped with long-lasting light sources that are safe, sustainable, and surprisingly effective.
Why Make a Survival Candle?
In times of emergency, light and warmth are critical. Store-bought candles are convenient but not always readily available or long-lasting. Making your own survival candles ensures you have control over the materials, burn time, and safety.
— Jamie W., Emergency Preparedness Specialist
Supplies You’ll Need for Different Types of Survival Candles
Before diving into specific recipes, here’s a basic list of common supplies:
You’ll need wick material such as cotton string, toilet paper, or t-shirt strips. Heat-safe containers like mason jars or tin cans are essential. A heat source for melting, and oils or fats like olive oil, butter, or coconut oil, will act as the fuel. Optional ingredients include essential oils for scent and crayons for color.
Cheese Wax Survival Candles
Cheese wax, often found coating hard cheeses like Gouda or Edam, makes an excellent survival candle base due to its reusability and stability.
To make this candle, melt cheese wax slowly in a double boiler. Place a wick in a heat-safe container and pour the melted wax into it. Once it solidifies, your candle is ready. Wrap in parchment or foil for storage.
— Alan P., Homestead Educator

Beeswax Candles for Emergency Use
Beeswax is a favorite among preppers and homesteaders. It burns cleaner and longer than paraffin and has a natural honey scent.
To make a beeswax candle, melt the wax in a double boiler, place your wick in a container, and pour the wax in. Let it cure for 24 hours. You can also add essential oils to personalize the scent. Beeswax has air-purifying properties, emitting negative ions while burning.
— Laura T., Natural Living Blogger
Olive Oil Survival Candles
Olive oil isn’t just for cooking—it also makes a simple and effective emergency candle. Use a glass jar or dish, soak a cotton wick, and keep it upright using a wire or toothpick. Add olive oil and light. It’s smokeless, nearly odorless, and has a long shelf life.
— Dr. Niko S., Historical Survival Techniques Researcher
Butter and Toilet Paper Candles
Butter can double as an emergency candle when combined with toilet paper as a wick. Cut a portion of butter, roll toilet paper into a wick, and insert it. After a few tries, the wick will catch and offer a short-term flame.
— Sarah L., Urban Survival Instructor
How to Apply and Use Survival Candles
Survival candles are useful in a range of scenarios—from home blackouts to wilderness camping. Place candles in strategic home locations and waterproof containers in emergency kits. Test each type in a safe setting to understand burn time and safety.
On camping trips, beeswax and cheese wax candles resist wind well. Olive oil candles are ideal for indoor use or in enclosed outdoor spaces. Keep butter-based candles for short-term emergencies or as a last-resort option in your bug-out bag or vehicle.
— Mark H., Disaster Readiness Consultant
When to Seek Professional Help
Although making survival candles is a simple project, there are cases where professional advice is wise. If you have respiratory issues, consult a doctor about what candle ingredients are safest. For large-scale production or sale, review fire regulations and safety standards with local authorities or a certified chandler.
Never leave a homemade candle unattended. Ensure they’re placed on non-flammable surfaces and extinguish them fully when not in use.
— Jessica F., Fire Prevention Specialist
Conclusion: Light in the Darkness
Making your own survival candles is more than just a fun DIY—it’s a life skill that builds resilience. Whether you’re crafting them from beeswax, olive oil, or even butter, each candle represents a small but powerful form of self-reliance. The beauty of these candles lies not just in their utility but in their simplicity. With a few household items, you can bring light and warmth into even the darkest situations.
Stay consistent in your preparedness, experiment with different materials, and keep learning. The more you know, the brighter your future will be—even when the lights go out.
— Kelly M., Homestead Survivalist